This article outlines how to set up and use Calendar Based PM Schedules.
A Calendar-Based PM Schedule enables you to automatically generate Preventive Work Orders on a recurring cycle.
Definitions of Key Fields
- Model Work Order – A predefined Work Order template
- Equipment/Asset – Asset linked to the PM Work Order
- Calendar Interval & Calendar Interval UOM – The numbers of Days/Weeks/Months between PM Work Orders.
- Release Window – How many days in advance of the PM Due Date that the Work Order will be generated and released.
- PM Due Date Override – Entering a date will override the Due Date for the next Work Order.
Setting Up a Calendar Based PM Schedule
There are three requirements for setting up a Calendar Based PM Schedule
- A Model Work Order
- The Equipment/Asset
- The calendar interval
Figure 1 – New PM Schedule Page Layout
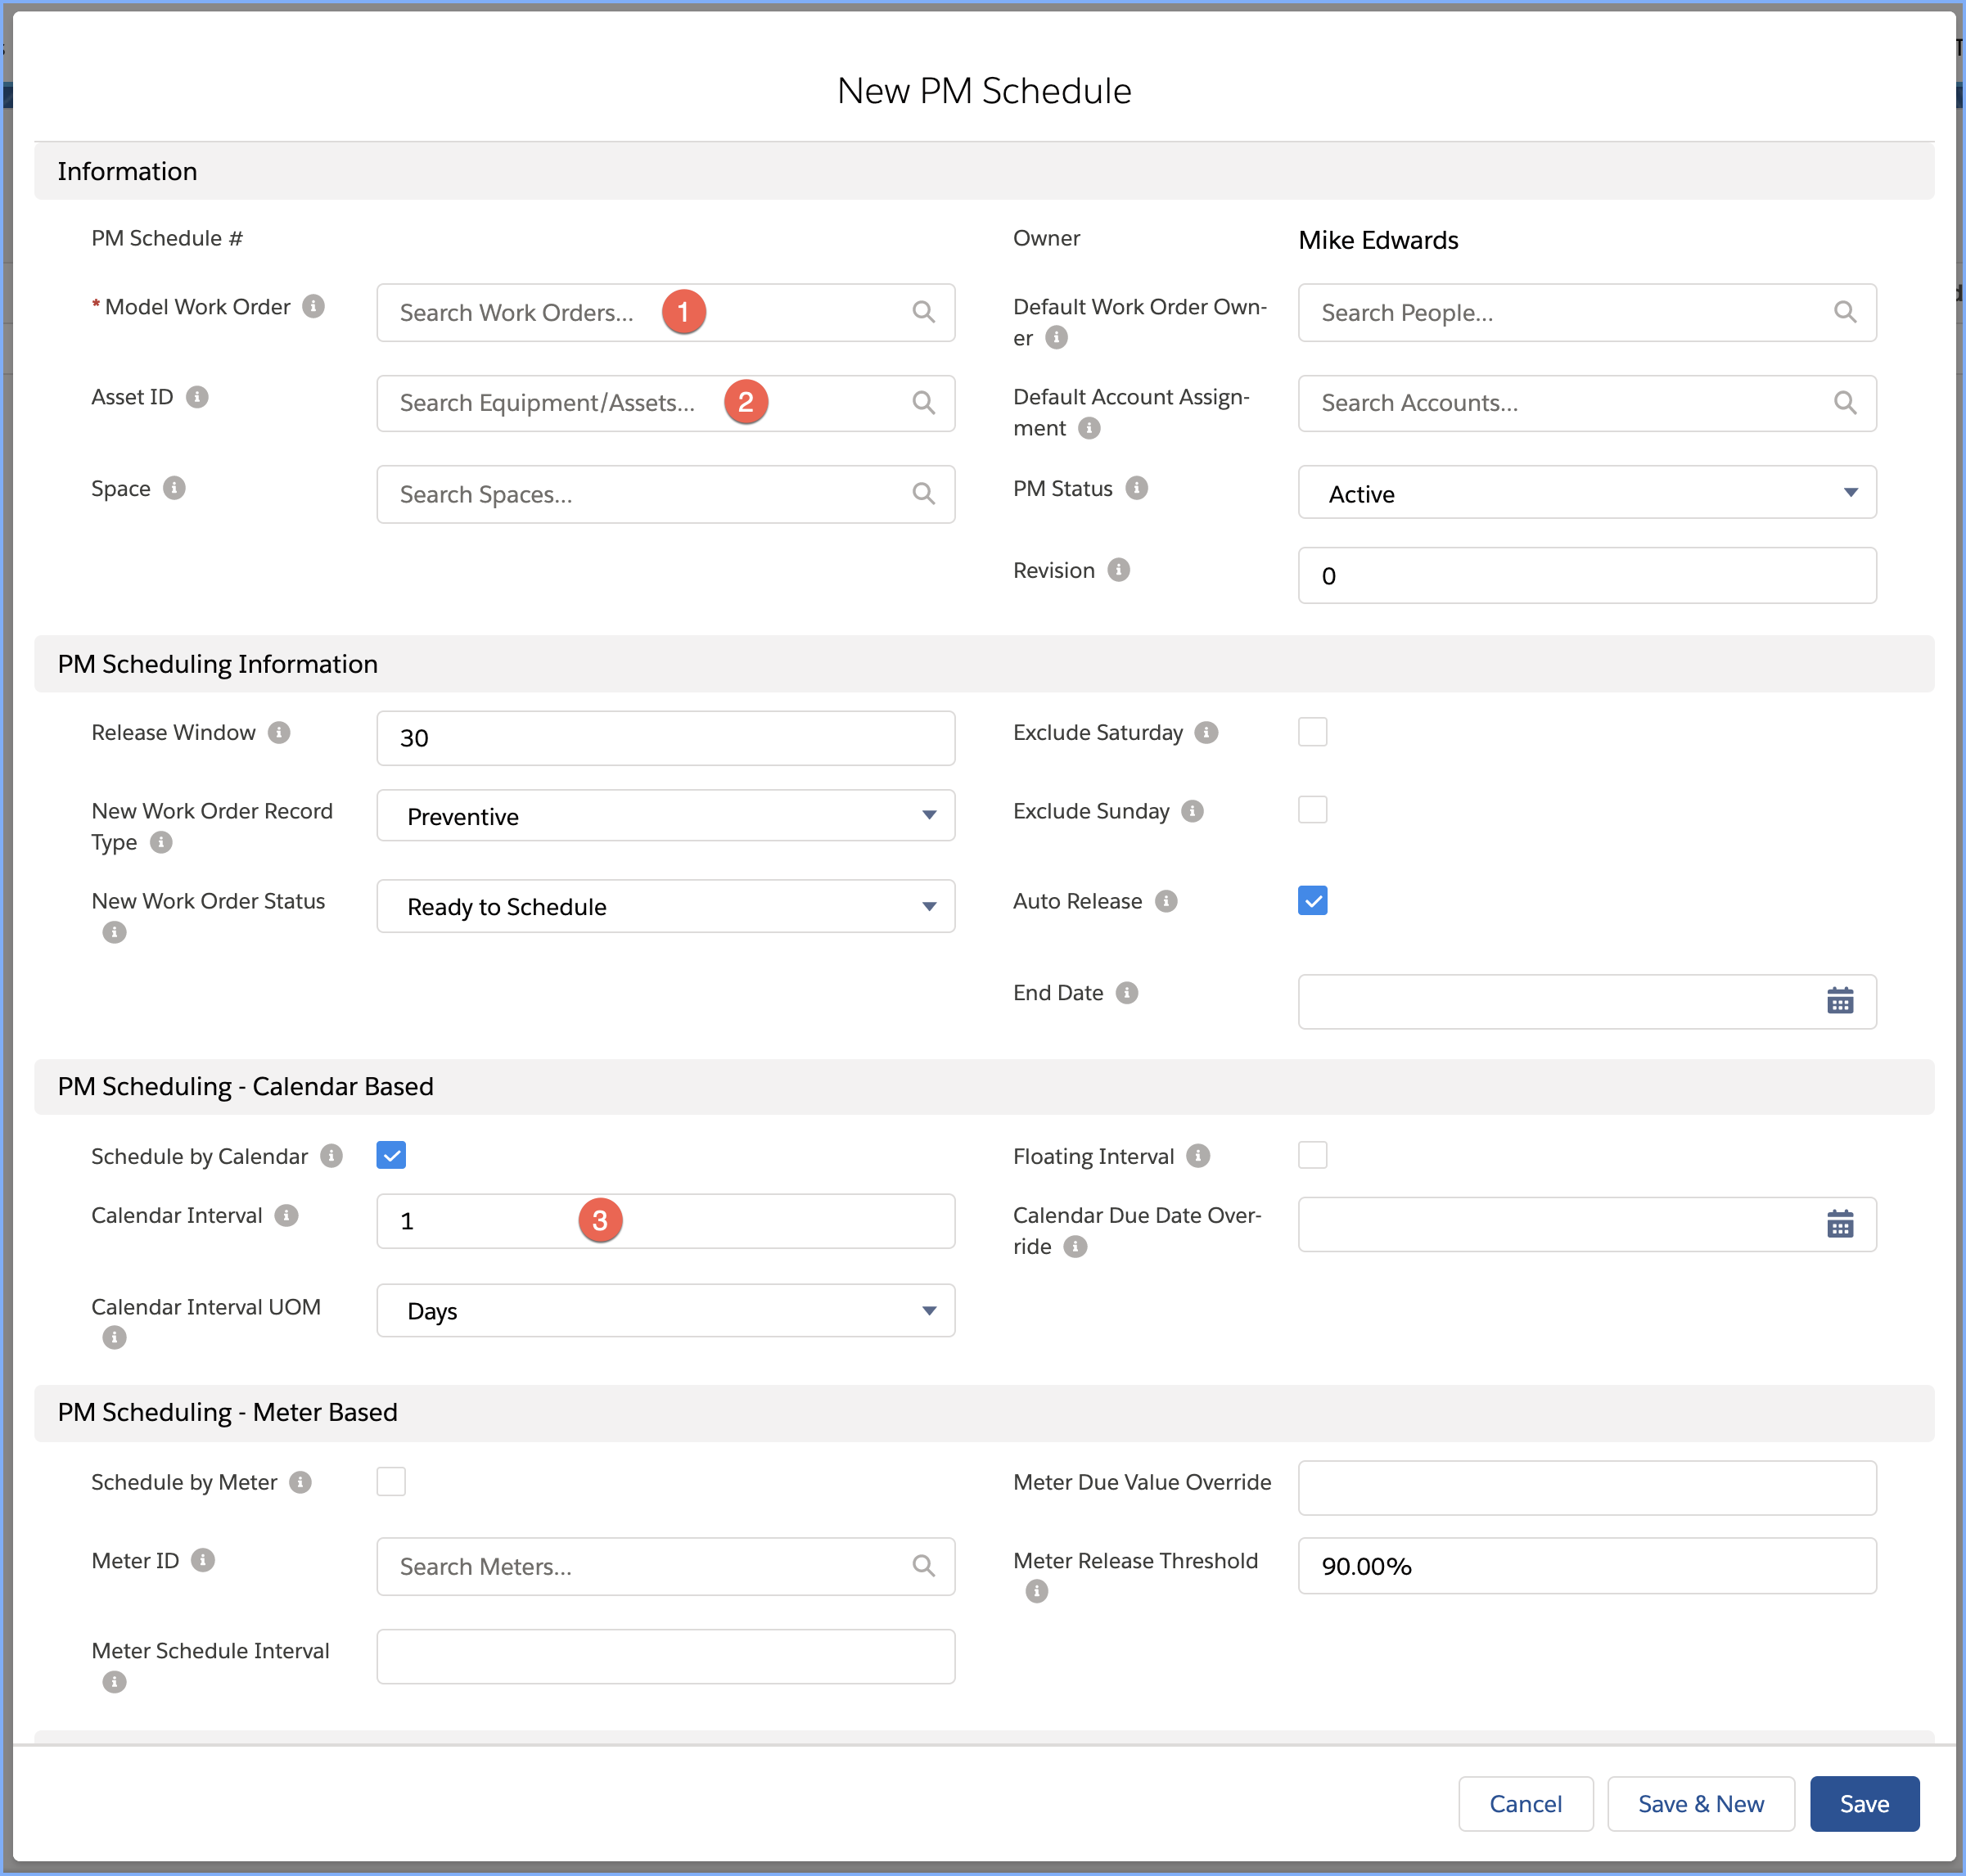
When entering a new PM Schedule, you must enter a Calendar Due Date Override to specify the first work order due date.
Provided that the Auto Release field is checked (default value), a PM work order will be automatically generated when the batch APEX jobs run. The PM Work Order Release Date is determined by subtracting the Release Window (Days) from the PM Due Date.
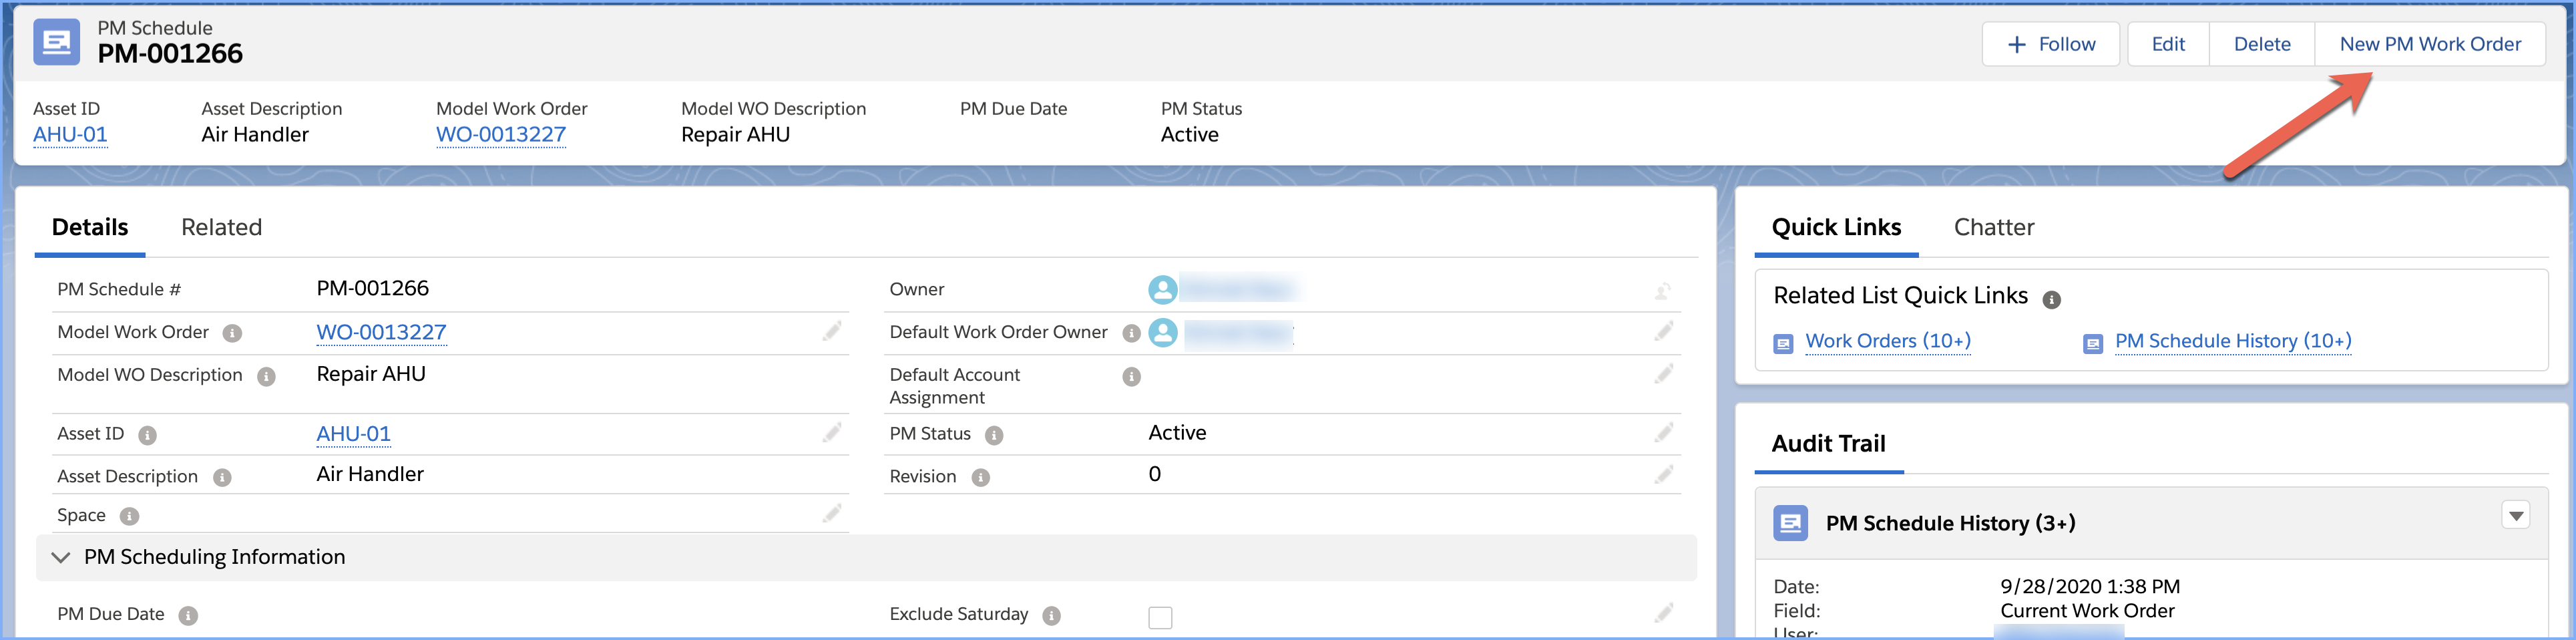
You can manually generate a PM work order by clicking the New PM Work Order action button as shown in Figure 2.
Figure 2 – New PM Work Order action button
Fixed vs. Floating Interval Scheduling
- Fixed Interval PM Scheduling
The Due Date for the next Work Order is based on the Current Work Due Date + Scheduling Interval
Can have multiple Work Orders open at a time. The automated release process will continue to release Work Orders.
- Floating Interval PM Scheduling
The Due Date for the next Work Order is based on the Last Work Order Completion Date + Scheduling Interval
Will only have one Work Order open at a time. If the Work Order is not Completed, no further Work Orders will be released
Pausing a Calendar Based PM Schedule
To permanently Stop, set the PM Schedule Status = “Inactive”.
To temporarily Stop with a known restart date, simply enter a PM Due Date Override.
Automatically assigning PM Work Orders to a User
When the PM Work Order is created, the Work Order record owner will be the Default Assigned User. If the Default Assigned User is blank, the Work Order will be owned by the PM Schedule record owner. If the PM Schedule record owner is inactive, the Work Order will be owned by the running user.
Automatically assigning to a Queue
- Enable the Work Order and the PM Schedule objects on the desired Queue.
- Assign the Queue as the PM Schedule record owner.
- Leave the Default Assigned User blank.
When the PM Work Orders are generated, they will be owned by the Queue.